Posted on

Crochet and Painting

The weeks have been speeding by and much has happened here at the Studio; painting and more painting, and also tons of crochet. Sharing my painting is more uncomfortable for me as it is so much more personal. Only recently has it been that I’ve felt that what has been painted is good enough to share. That not good enough feeling keeps so many of us creatives down. The painting is such an outpouring of the joy in my heart these days that I can’t not paint.

Painting

Painting has been taking over my life and I couldn’t be happier. It is a good thing and keeps me moving around and busy. If you follow chocodogstudio on instagram then you have seen these pieces in process. It seems like time has flown by and it has. At least 5-6 pieces have been painted since the first of the year with several others in a partially painted state. The studio is so full with furniture that it can be hard to move around and open the curtains.

Hand Painted curio shelving unit with each shelf smaller than the other. The shelf supports are turned wood and painted in a variety of very bright colors and finished to a high gloss. Each shelf is painted in a different rainbow color with patterns painted on each shelf.
This shelf unit is also a custom piece and is already home.
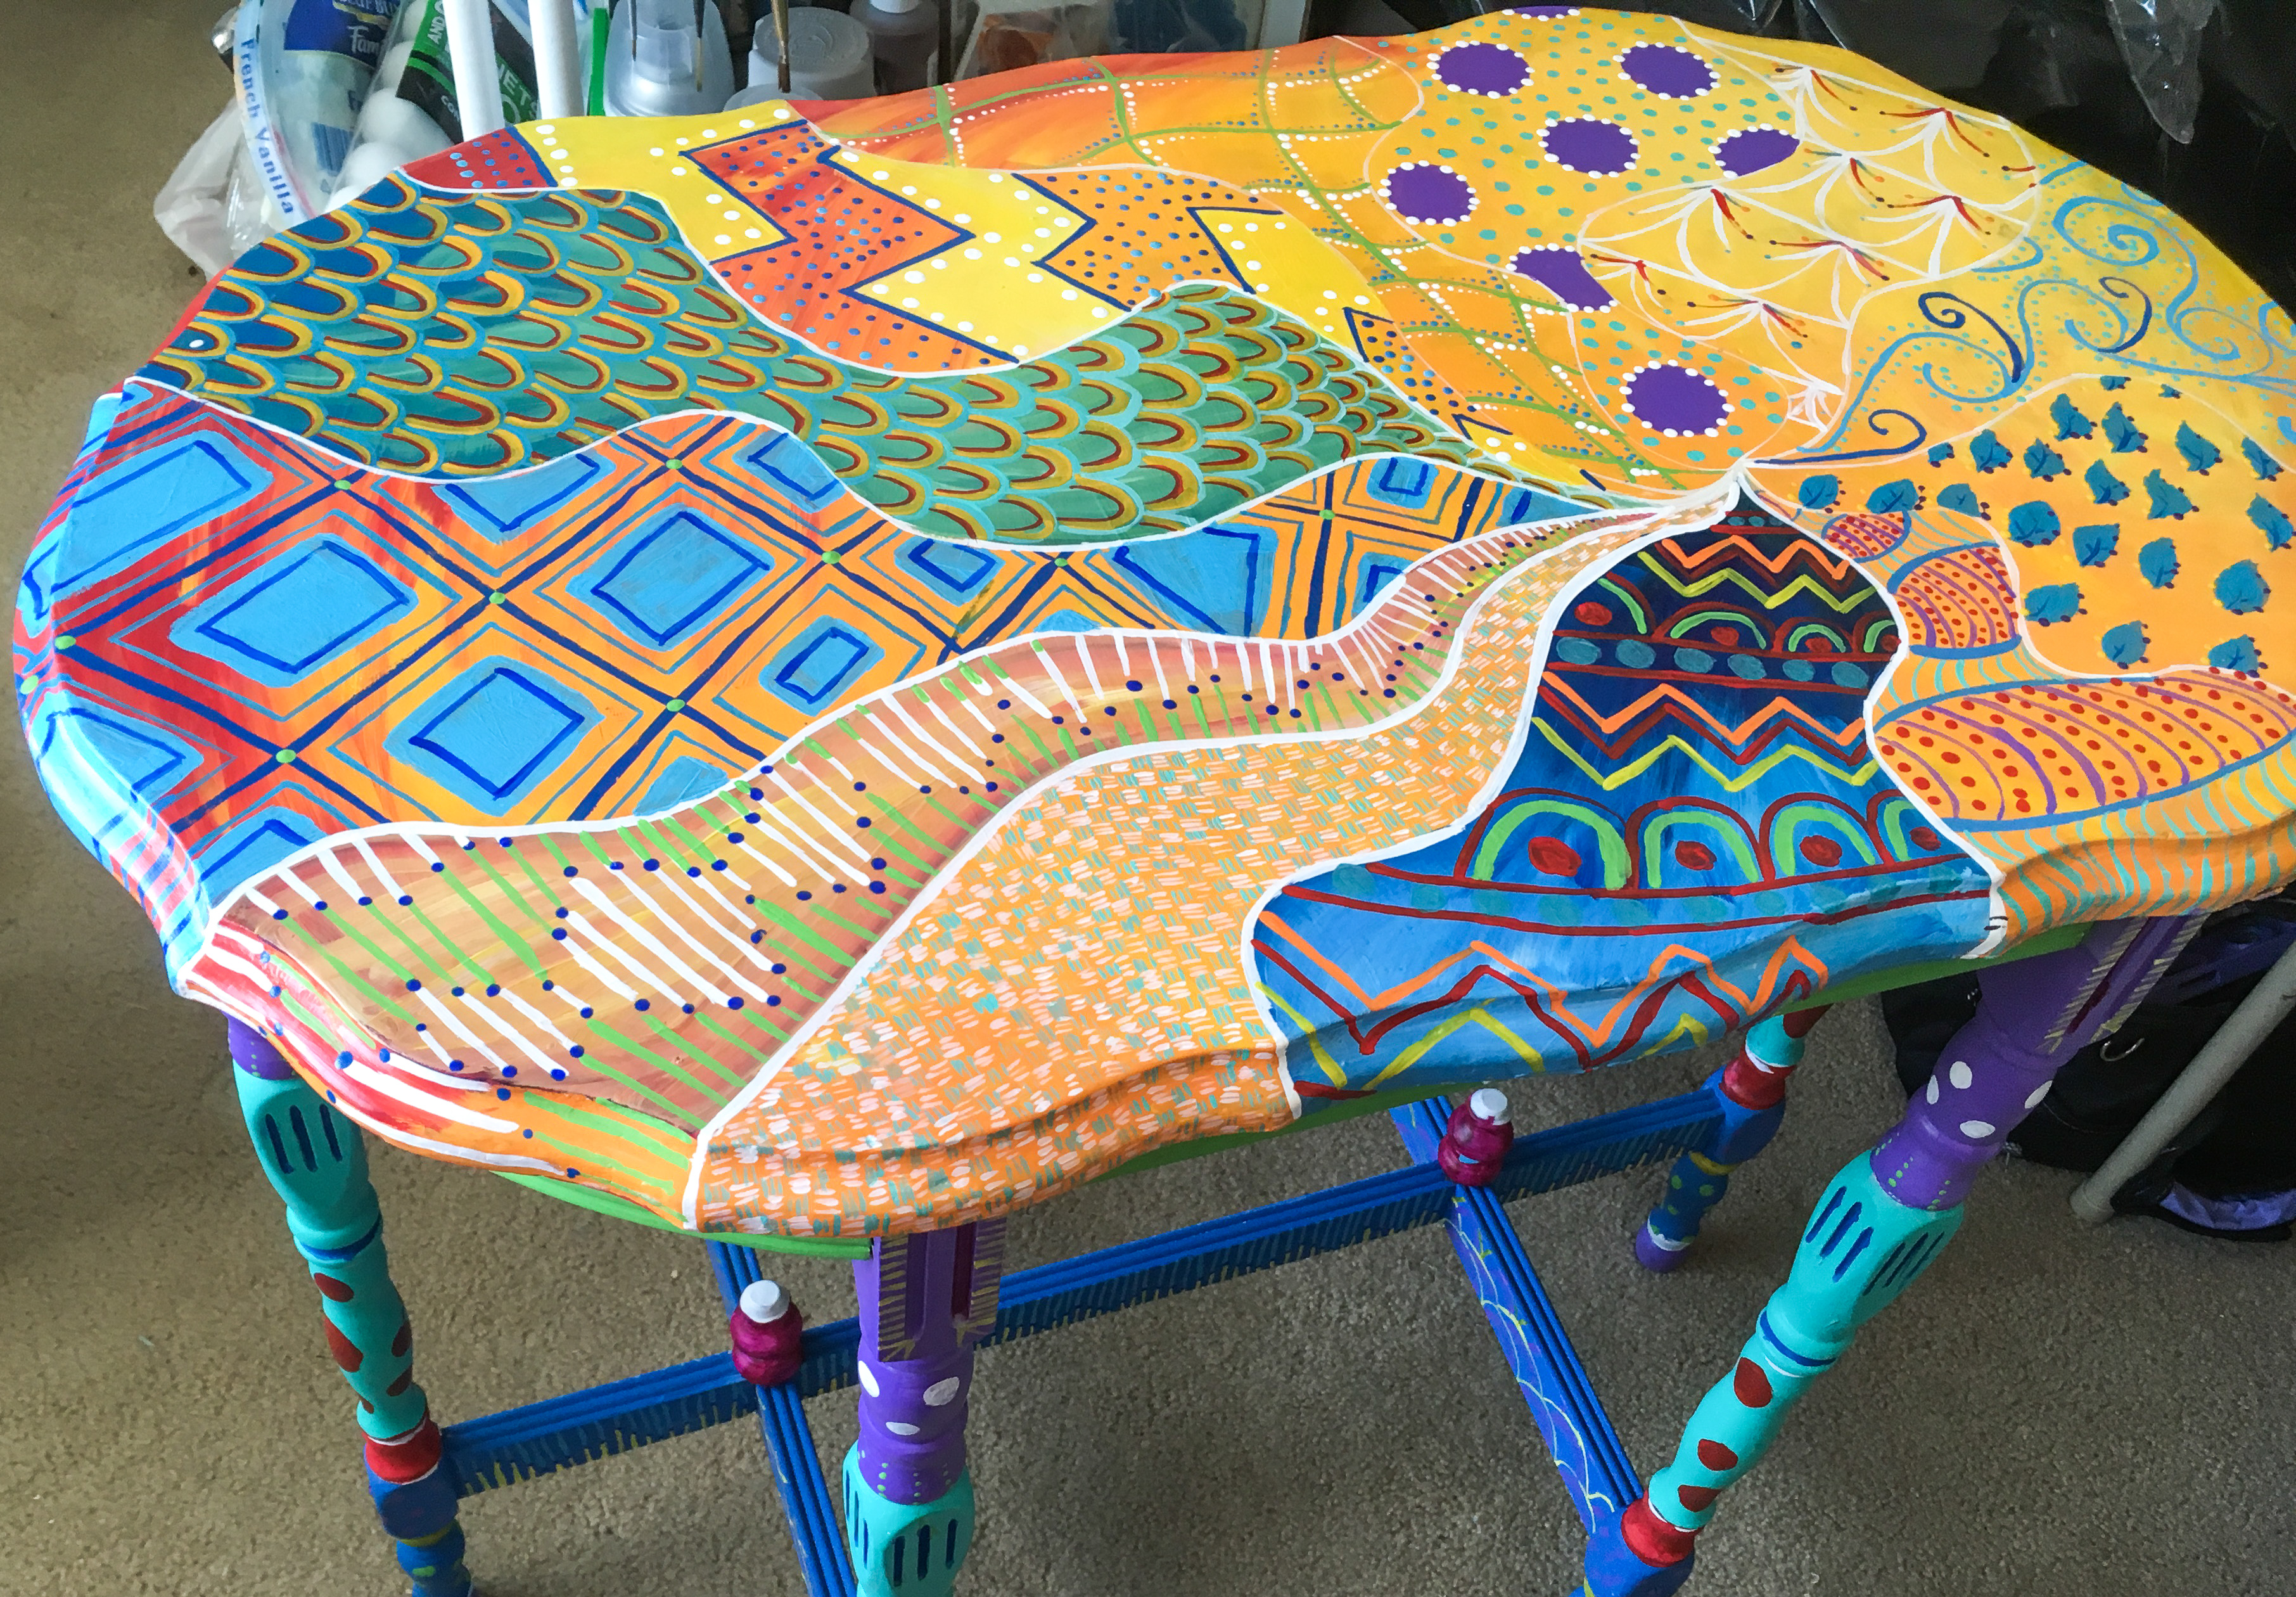
A brightly painted patterned table about the right size for an entry hall. It has a piecrust edge and is oval in shape  with six legs.
This table isn’t quite finished but it’s getting close to the end.
This photo shows an oblong octagon shaped table with 3 legs next to a brown leather couch. The table is hand painted in a variety of patterns and colors.
Here you can see how pretty and practical the painted table is in a living room. The glass top protects the table from hard use.
This little occasional table was a custom painted piece. These are the legs to the table shown above.

Crochet

The newest project is this cute granny square that I’m sharing with you. It’s will be used in a memory afghan using my client’s Mother’s yarn stash. Isn’t that a sweet idea and such a good one. There will be two blankets coming out of this yarn stash. Blocking the squares will get rid of the wonky squares and ease the slight difference in them. Since this is crocheted out of varying brands of yarns the difference in the gauge of the yarns is affecting the size of the squares slightly.

Floral Memories Granny Square Tutorial

Center

Using an infinity ring, CH2 and HDC into the ring 11 times, for 12 total stitches. Pull the center tight to close the center of the flower. Weave in all ends as you go.

2nd round

Ch 3 HDC in next space chain 1,* HDC in next space chain1, Repeat from * around the circle. Slip stitch to join. There should be 12 CH 1. ch1

3 round (petal round)

*Crochet 4 DC into the next CH1 space from the previous round. CH 1 into the next space. Repeat from * around the circle. SS to join to the first ch1.

4th round

Chain 4, ss to join to 3 DC in petal. CH 3, DC to the SS from the previous row. *Chain 3, ss to join to the 3rd DC in the petal. Continue from * around the flower. SS to join CH 4.

5th Round

CH 2, HDC 2 into same CH 4 group. *HDC 3 times into next CH 3 group.
Create 1st Corner in the next CH 3 group, HDC 1, DC 1, CH1, DC 1 HDC1. HDC3 times into next CH3 group,

Continue from * around the block creating three more corners. SS to join to 1st HDC group.

6th Round

CH 2, HDC in each stitch until corner. At corner, HDC 2 times, CH 2 times, and HDC 2 times. Continue crocheting HDC in each stitch. Treat the other three corners the same as above, SS to join, Tie off and cut yarn.

This pattern is short on photos but this blog post doesn’t post today it might be months before you see anything!

Talk to you later,

Karen

Posted on

Challenge Blanket and instructions!

Here it is in all of its glory, the challenge blanket and the instructions! I started this in the 100 items in 100 days challenge  and I meant for it to be the very last entry but I just couldn’t wait to get this finished.Challenge Blanket and instructions!

I love granny square blankets, but this one is great too! It has one thing going for it that the Granny Square blankets don’t. Can you guess what it is?Challenge Blanket and instructions!

It has no holes! That is right, absolutely no holes for the air to get through. So, if you want to crochet a blanket for a non-Granny Square lover this is the one to use!   I used DK weight yarn for this blanket as it was what I had on hand and a G sized hook.Challenge Blanket and instructions! Challenge Blanket and instructions! Challenge Blanket and instructions!

This is a super simple pattern and I am going to share it with you right now! If you need a more complete pattern, I am pretty sure that there is already one on Ravelry.com.

Chain the length you want the blanket to be as a multiple of four. Half double crochet in each chain across.

2nd row.

chain five, skip the first two half double crochets and half  double crochet in the third, half double crochet in the fourth chain two and skip the next two half doubles, half double in the next two and continue in this pattern across the blanket.

3rd row.

Chain two and turn. You will have a funny loopy thing there at the start. Double crochet down into the 2nd row into the first half double that you skipped and then double crochet again into the second half double that you skipped in the row previously.
Chain two and continue in this pattern across the blanket.

This is the basic pattern if you have any problems just let me know.

The last row in the blanket you double crochet into the spaces and half double into the tops of the double crochets of the previous row.

To finish it out I simply crocheted a simple grey  border around all the edges of the blanket with two chains in each corner stitch.

Let me know if you make one! I would love to see it.

Talk to you later,

Karen

P.S. This one is for sale in the ChocolateDogStudio.etsy.com shop!

https://www.etsy.com/listing/186196415/hand-crochet-blanket-afghan-multicolor

Posted on

Tutorial: Scalloped Edging

I use this scalloped edging all the time on different crochet projects. It adds a nice finished edging. It also works well with Granny Squares as I think it is a variation. You will need a granny square stitch project either a granny stripe  or granny square blanket.

Supplies

  • yarn
  • granny square
  • hook to match yarn


The Sides

Tutorial: Scalloped Edging, granny square edging

I am starting with 1 granny square. It has five holes on each side counting the corner holes.

Join your yarn to a corner.

Tutorial: Scalloped Edging, granny square edging

*Crochet a double crochet from the joining stitch to the open space between the groups of      double crochet.

Tutorial: Scalloped Edging, granny square edging

Tutorial: Scalloped Edging, granny square edging


Crochet 5 or 6 double crochet into the space. Here I crocheted five because the yellow yarn is worsted weight and the square is a dk weight yarn.

Tutorial: Scalloped Edging, granny square edging

With the last double crochet stretch it over to the next space and join with a chain.

Tutorial: Scalloped Edging, granny square edging

Repeat from * across your square or squares until you reach the corner.

There are two corner options.


Corner Option #1

Tutorial: Scalloped Edging, granny square edging


Join just as you have and then turn the square.

Tutorial: Scalloped Edging, granny square edging

Do the next set of five (or six) double crochet just as you have. The corner will look like this.

Tutorial: Scalloped Edging, granny square edging

and this when you finish two sides.

Tutorial: Scalloped Edging, granny square edging


Corner Option #2

Tutorial: Scalloped Edging, granny square edging

join just as you would and then double crochet into the corner space and chain two.

Tutorial: Scalloped Edging, granny square edging

Do another double crochet followed by a chain.

Tutorial: Scalloped Edging, granny square edging

It will look like this when you round the corner and finish another side.

Tutorial: Scalloped Edging, granny square edging


This adds a nice finish to the edging. It will look great on a blanket or scarf.

The trick to this edging is that you need an odd number of spaces to finish evenly.

Have fun with this edging and share some photos with me on my facebook page of your projects with the pretty scalloped edging.

https://www.facebook.com/Chocolatedogstudio

It is a snow day here and I have a ton of things to get finished. This tutorial was one of them.

See you later,

Karen