Last week we talked about the reverse single crochet border. Our second super easy crochet border is the rolled edge (or fold over) border. This is another super easy border for any crochet item. I just love how it turns out. I haven’t used this one much, but it works so great and gives the project a nice, finished look. It is a great border for all of those striped afghans that have tons of ends to weave in; you can skip the weaving in, cover the ends up, and provide a nice finished border all at the same time. It looks awesome. Perfect for a ripple afghan, as you only need to put the border on the side edges to cover all the ends.
I particularly like it for a more masculine look.
I used it on this afghan. The color changes on nearly every row of this afghan so the ends were overwhelming.
Supplies
- large eye needle
- quilter’s pins or safety pins
- scissors
- border yarn
- crochet hook
Skills
- front post single crochet
- single crochet
- basic sewing skills (whip stitch or overhand stitch)http://www.chocolatedogstudio.com/wp-admin/post.php?post=8173&action=edit
In my mind, crocheting a border + covering up all those ends at the same time = a brilliant idea!
As I mentioned, this pattern works really well on afghans with lots of ends, like this one:
See all the ends?
With the right side of your work facing you, join your border yarn to one corner.
Front post single crochet along the front of the afghan. You will want all the seams on the back, as shown above. See the lovely front view below.
Crochet 5-6 rows, at least, or whatever width will cover the ends and provide a nice frame for your afghan.
I usually crochet about 6-7 rows.
Here I have three rows, not including the front post single crochet row. Comb all the ends away from your work while you are crocheting.
Subsequent Edges
When you start rows for the next edge of the blanket, you will be considering the previous edge you just made. Start by joining your yarn at the side of the edge you just made, to the 2nd row and then crochet your front post single crochet across the new edge.  Do the same thing for the third edge.
When you do the last edge, you’ll begin the first row of the border same way. When you get to the end of row, keep going onto the first section of edging you made — stop on the second row of the border just like you started.
Here you can see that the second edge began in the 2nd row of the border.
FYI: the last side of this border will both begin and end on the 2 row of the 3 border rows.
Variation: You can crochet the rolled edge border in odd numbers. The pink border above is three HDC rows. The Blue borders below are 5 rows. You would start your 2-4 border rows on the 3 row of the last edge.
Sewing The Rolled Edge
Trim any ends longer than 2-3 inches.
Fold the first border edge over so that it covers the front post stitching and matches at each end. Pin or use safety pins so that it stays in the right place while you are sewing.
Be sure to remove the pins as you sew.
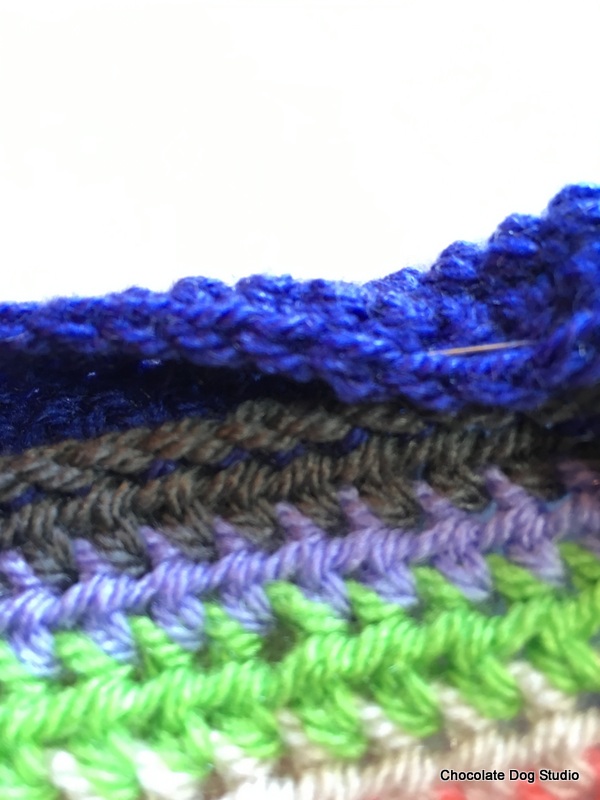
See the blue yarn embedded in the gray in the above photo? Catch that yarn when you whip stitch the edging down if you can, so your edges don’t show.
Be sure that the ends remain tucked into the border band as you sew.
Continue sewing the band down all across the first side.
The above photo is the back and the photo below is the front.
I haven’t sewn all the way across but you can see how nice it is looking along the top of this photo. All the ends are covered up and there are none to weave in.
Folding Over the Remaining Edges
Fold over the next edge matching the sides and creating a nice square corner.
Attach the yarn at the corner point and (tucking the end in) sew down from the corner and then across, whip stitching all sides of the edge down.
Sew this edge down using the same method that you used earlier. Remember to catch the ‘seam’ from the front post single crochet you did!
Sew all the rest of the border down using the same methods.
There you have it! A lovely bordered blanket and no ends to weave in!
What I’ve Been Up To
I have been working on some new patterns lately. The weather has been dull, gloomy and wet, but today it is gloriously sunny.
To celebrate, here is the new pattern for the Sunshine Scarf.
Talk to you later,
Karen


